Add/Edit/Delete a Room
A room is added, edited, or deleted in the Setup module. During the process of adding a room, you will have the opportunity to include processors, assets, and attributes.
You can:
Add a Room
- On the Rooms tab, select the node to which you wish to add a room.
- Select Add Room on the toolbar.
- If the room has an alias and you know the exact name of that alias, you can enter it in the Alias field and select Lookup Room Name. Crestron Fusion® software will look up the alias of the room and return its information.
- Enter the room name in the Name field if it has not been automatically filled in via the Lookup Room Name function described in step 3.
- Enter an appropriate description in the Description field. This should in some way indicate the use of the room and the equipment installed in or serving the room.
- Select Server Group from the Server Group drop‑down menu. The entries that appear in this drop‑down menu are set up in the Configuration Web Client.
- Enter location information in the Location field. This information is separate from the geographic and should be just a general description of the location, such as Building C.
- Select the proper time zone for the room using the Time Zone drop‑down menu. This is very important because selecting the wrong time zone for your room will result in scheduling problems.
- Enter the appropriate e‑Control URL in the e‑Control URL field. For more information refer to the e-Control topic.
- Enter the appropriate Webcam URL in the Webcam URL field. For more information refer to the Webcam topic.
- Select the Scheduling Details Tab tab to set up the room's calendar. You will see the Server Access drop‑down where you find the available calendar types in your installation.
- Each of the selections in the Server Access drop‑down menu causes certain associated fields to display on this tab. Select each of the following calendar types for more information: External Groupware, Google Calendar, Lotus Domino, Micros, MS Exchange EWS, MS Exchange WebDAV, R25, and Crestron Fusion.
- Select the Address tab and enter geographical information for the room. This information will be used when scheduling a room for a meeting or an event. If the node above the room has geographic information, that information will be inherited by the room and the contents of the fields on the Address tab will be grayed out. For more information, refer to Add, Edit, Delete, oe Apply Geographic Regions.
- Enter the appropriate building location as the Adjacent Location. The Adjacent Location is used by Crestron PinPoint™ proximity beacon during Meeting Scheduling to locate Nearby Rooms if the preferred Room is unavailable. See Room Details - General Tab: Crestron-PinPoint.
- Enter the appropriate AirMedia Info in the AirMedia Info field. Enter the AirMedia IP address and code if the room is connected to an AirMedia device. Refer to Room Details - General Tab: Crestron-PinPoint.
- Enter the appropriate Room Capacity in the Room Capacity field. Enter the Room's seating capacity.
- Use the Room Type drop‑down menu to select the Room Type from the list. Refer to Room Types.
- Select the Custom Properties for Rooms and Assets tab and set up the custom properties for the room.
- Enter your settings in these fields as required by your room.
- Select the Processors tab to add a control processor to your room.
- Select Add. The Add Processor to Room dialog will open.
- Enter a name for your processor in the Name field. This could be the actual model of the processor or a user-defined name in Crestron Fusion.
- Enter the physical location of your processor in the Location field.
- Enter the IP address of the processor in your local network in the IP Address/Hostname field.
- Enter the MAC address of the processor in the MAC Address field.
- Use the Connection Direction drop-down to select Outbound. The Crestron Fusion Server initiates control system processor discovery.
- The Port field will be filled in with 41794 by default. This is the reserved Crestron CIP/TCP port. Change this value only if required by the needs of your specific installation.
- The Secure Port field will be filled in with 41796 by default. This is the reserved security port for a Crestron processor. Change this value only if required by the needs of your specific installation.
- Enter the admin account user name set in the processor in the Username field.
- Enter the admin account password set in the processor in the Password field.
- Select the Discover Symbols check box if you want Crestron Fusion to look for symbols installed in the processor. For 7.2 version symbols and above, refer to Auto Discovery for more information.
- Select Save & Close if you are satisfied with your changes.
- When the processor is successfully added, it will be added to the Processors tab. Select the Assets tab to continue setting up your room.
- Select Add under the Assets tab to display the Add Asset to Room dialog box with the Asset Details tab selected by default. For information on what constitutes an asset, refer to the Assets topic. For more information on adding an asset, refer to Add, Edit, or Delete an Asset.
- Enter the name of the asset in the Name field.
- Enter the asset serial number in the Serial Number field.
- Select the asset type from the Type drop‑down menu. For a list of default asset types, refer to the Asset Types topic. For information regarding adding an asset type, refer to Add, Edit, or Delete Asset Types.
- Enter the manufacturer in the Make field or click the ... (browse) button and select the appropriate manufacturer from the list. If this field is populated in this way, the Model field will be populated automatically with the proper information.
- Enter the model in the Model field.
- The Connection Type drop‑down menu contains valid connection types for assets types. The options are None and Network.
- If the asset has a Network connection type, enter the IP address of the network connection to which you will be attaching the asset in the IP Address/Hostname field. This allows Crestron Fusion to see the asset.
- Select the Additional Details tab.
- Choose the Economic Lifespan of the asset using the drop‑down menu of the same name. The default shown for this drop‑down menu may change depending on the selection made in the Type drop‑down. Some asset types have a default lifespan of five years and others have a lifespan of one year. These defaults are chosen in the Edit Asset and Edit Asset Type dialog boxes.
- Enter or select the appropriate date by clicking the Date of Purchase field. A calendar pop‑up will appear.
- Enter or select the appropriate date by clicking the Warranty Expiration field. A calendar pop‑up will appear.
- Enter the number from your company's asset tag in the Asset Tag field.
- Enter the MAC Address of the asset or its network adapter in the MAC Address field.
- Select the Custom Properties tab.
- Custom Properties that are available to be assigned to the asset are displayed and editable in this tab. Setting a property assigns that property to the asset.
- Select the Maintenance Details tab.
- Make the appropriate selections, being sure to add any relevant service contract information in the Service Contract Information field.
- Select Save & Close to commit your settings and close the Add Asset to Room dialog box.
- Select the People tab.
- Select Add. The Add People to Role dialog box opens.
- Pick the role you would like to add your person to from the Pick a role drop‑down menu, and then pick the person(s) for that role by selecting the check boxes in the Pick people for the selected role field.
- Select Save & Close to display the new role and person(s).

When the Add Room dialog box opens, the Room Details tab will be selected by default.
NOTE: In Microsoft Exchange Server® software, the alias of a room can be found on General tab of its Properties dialog box.
NOTE: A red asterisk next to any field indicates that the field is required.
NOTE: This tab will be empty if your organization has not defined any asset custom properties.
Edit a Room
Editing a room employs essentially the same dialog box as that used when creating a room. The only difference in this case is that actions have been added to this room, which causes the Actions tab to be displayed.
NOTE: When a room is created using Symbol Discover, a separate room is created for every symbol encountered in the processor you are installing. Likewise, when Symbol Discover is used when adding a node, a node is created for every symbol. This means that a room (or node) as represented on the room tree in the Rooms tab might be nothing more than a symbol. For information on editing a symbol, refer to Add, Edit, Remove, or Delete Symbols.
- Open the room you wish to edit by selecting its check box and then selecting Edit, or by selecting the room. The Edit ‑ Room dialog box will open.
- Make the changes appropriate to your situation on the Room Details tab, and then proceed to the Scheduling Details tab.
- On the Scheduling Details tab, the Server Access drop‑down menu allows you to change the calendar type for the room. Select the calendar type appropriate to your situation.
- On the Address tab, you can enter new address information if the location of your room has change unless the geographic information has propagated through from a node above the room. In this case, you will not be able to make any changes.
- On the Custom Properties tab, edit the properties if something such as the equipment installed in the room has changed. This will ensure that the room is accurately searchable when using the Room Booking Wizard in Crestron Fusion RV's Monitoring Web Client.
- Select the Symbols tab to edit the symbol applied to the room.
- Edit the appropriate symbol by selecting its check box and then selecting Edit. The Edit ‑ Symbol dialog box will open with the Symbol Details tab displayed. A symbol can be added to a room by selecting Add.
- On this tab, the Symbol Name, Version, IPID, and whether or not to use SSL can all be changed. Make your changes according to your situation and then select the Attributes tab.
- You can add, override, or remove an attribute on this tab. If you are going to add an attribute,select Add. The Add Attribute to Symbol dialog box opens.
- Select the attribute(s) you wish to add by selecting the appropriate check boxes in the attribute tree.
- Select Save & Close when your changes are complete.
- Select an attribute using its check box and then select Override. The Override Attribute dialog box will open.
- Make the changes required to alter the behavior of the attribute by entering new values in the Min Value and Max Value fields, and then selecting the adjacent Override? check boxes. This will reset the attribute to operate within the values you have entered.
- Select Save & Close when your changes are complete.
- Select the Assets tab to make any required changes. The assets associated with the room will be displayed in the displayed table. Select the check box of the desired asset and then select Edit. Assets can be added by selecting Add.
- Make your changes as required, referring to the Add Asset to Room dialog box figures under Add a Room above. The dialog boxes are identical.
- When you have completed your changes, select Save & Close.
- Select the Actions tab to make any required changes. If adding an action is required, select Add to Add an Action. If editing an action is required, refer to Edit an Action. If removing an action is required, select the desired action using its check box and then select Remove. This will remove the action from the room but not delete it from Crestron Fusion. For information on deleting an action, refer to Delete an Action.
- When you have completed the changes, select Save & Close to commit your changes.
- Select the People tab to make any required changes. The people associated with the room will be displayed according to their roles and they can only be added or removed. To add a person to the room, refer to Add a Person to a Room. To remove a person from a room, refer to Remove a Person from a Room.
- Select Save & Close to commit your changes.
NOTE: Changing the calendar type chosen with the Server Access drop‑down menu will delete any meetings or events that may have been scheduled for the room.
NOTE: Selecting the topmost check box in an individual branch of the attribute tree will select all of the attributes beneath it.
Edit Multiple Rooms
Crestron Fusion RV allows you to simultaneously edit a group of rooms. When performing this function, only certain room parameters are available for editing.
- Select the rooms you wish to edit by selecting their check boxes and then selecting Edit.
- When the Edit Multiple Rooms dialog box opens, the Room Details tab will be opened by default.
- Make the desired changes by editing the appropriate fields and then selecting the adjacent check boxes. When your changes are complete on this tab, select the Scheduling Details tab.
- Choose the desired server type in the Server Type drop‑down menu and make any desired changes to the Username, Password, and Domain fields. These fields—for the WebDAV, EWS, and R25 server types—are the only editable fields on the Scheduling Details tab. Select the Edit check boxes to commit your changes. For more information, refer to Scheduling Details Tab.
- Select the Custom Properties tab to make changes. You will see the same custom properties as those described in the Custom Properties Tab topic. As with the other tabs, selecting the check boxes of the fields you have changed will commit those changes.
- Select Save & Close to commit your changes.
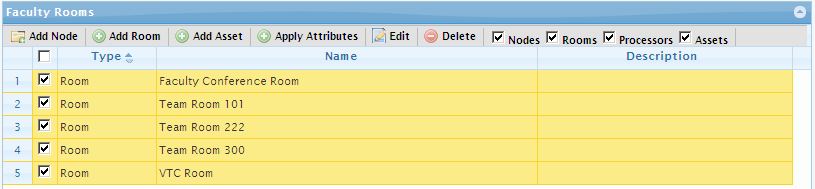
NOTE: The Edit check boxes commit the changes you make in the adjacent fields. If you do not check a check box, your changes for that field will not be applied.
Move Rooms
Rooms can be moved between nodes by selecting the desired room, dragging it to another node, and releasing it.
Delete a Room
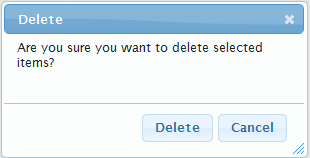
- To delete a room, select the check box for the room, and then select Delete. A Delete dialog will appear.
- Select Delete to proceed with the room deletion.