create
new user device, modify
its general or transport properties, delete
existing user device or import
and export it.
create
new user device, modify
its general or transport properties, delete
existing user device or import
and export it.
Crestron Studio® allows using custom SIMPL and/or SIMPL+ modules to create a custom user device which can then be added to the system and take advantage of any automated programming that will be generated. Note that at this time there is no functionality to edit existing Crestron device definitions in the Device Designer.
User devices are devices created by the users and stored locally in the user's database. They are NOT part of the standard database shipped with Crestron Studio®.
In the Product Browser, user devices are listed along with Crestron devices, and obey the same rules for adding to system, sorting, or filtering as regular Crestron devices. Note that the “Source” column for user devices will display “Central” or “Project”, instead of “Crestron”. Additionally, Crestron Studio® provides the "User Devices" layout which conveniently lists all available user devices. (Notice that user devices specified as Project User devices are displayed in the Product Browser only if the corresponding system project is open in Crestron Studio®.
Like Crestron devices, any user device can contain different slave transports and connection points. Note that only ONE of each type of transport (except IR, of which the user device may include multiples) is allowed to be added to your user device. While there is no technical limitation to the types of transports you can define for a device, at this time the available transports are limited to:
In Crestron Studio®
you can create
new user device, modify
its general or transport properties, delete
existing user device or import
and export it.
 What do I need to have to be able to create my own custom device in Crestron Studio®?
 Depending on the device that you wish to control you'll need to have available
either an IR Driver (IR Definition file), or one or more SIMPL and/or
SIMPL+ modules.
Depending on the device that you wish to control you'll need to have available
either an IR Driver (IR Definition file), or one or more SIMPL and/or
SIMPL+ modules.
I have a third party device
which is not currently supported in Crestron Studio®.
How can I use it in Crestron Studio®?
Provided that you have custom SIMPL and/or SIMPL+ module(s) for that device you can do the following to create your own user device in Crestron Studio®:
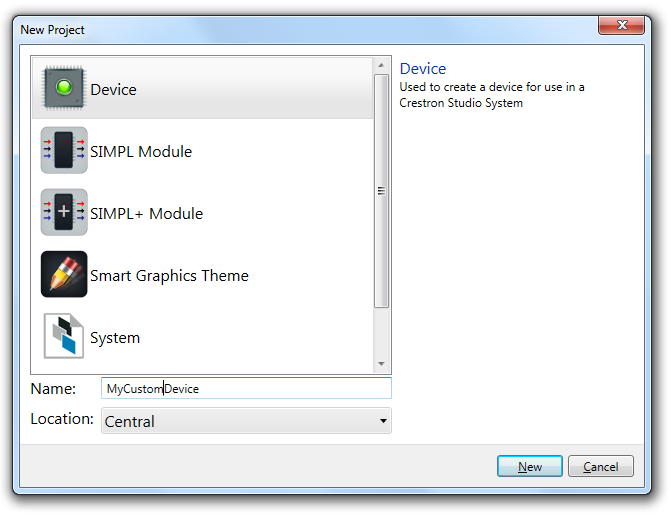
Create new device definition by following the steps below:
A dialog indicating that your device is created appears briefly and Device Designer opens in a new tab of Crestron Studio® labeled Device 'Device_Name' (where 'Device_Name' is the name specified in Name field (see the step c above).



 or
by selecting Save Device from
the File menu.
or
by selecting Save Device from
the File menu.Once your device is saved it can be located in the Product Browser (under User Devices) and added to your system just as you would add a Crestron device.
Where can I find IR Drivers or SIMPL modules to control my third party
device?
You may create your own IR files
in Crestron Toolbox™.
You can also receive modules to control the device that you need
from a co-worker, the manufacturer, Crestron Integrated Partners, etc.
Additionally, you can download applications, GUI Resources, IR drivers
and modules for third party devices from the Crestron
Application Market.
Can I create SIMPL User Module in SIMPL and use it in Crestron Studio®?
Yes,
you can create your SIMPL module
in SIMPL, or use an existing one to create your custom
user device in Crestron Studio®.
I
have trouble downloading modules from the Crestron Application Market?
What am I doing wrong?
Before you can download any files from the Crestron Application Market
make sure that the following prerequisites are met:
you are accessing the Crestron Application Market from a network connected to the Internet
you have a Crestron Application Market account (different than your account for www.crestron.com)
To download the desired module(s) from the Crestron Application Market simply follow the steps below:
Navigate to the Modules or IR drivers sections and then
narrow down the selection by device type or manufacturer (for example,
to get modules for AV receivers go to Home -> Modules ->
Device Type -> Receiver/Pre-amp)
- or -
Find the desired module/IR Driver by entering a search term in the
Search field located in the header and then click the Search icon.
The applicable modules/IR Drivers are listed.
Select the desired module/IR Driver, add it to your cart and
proceed to checkout:
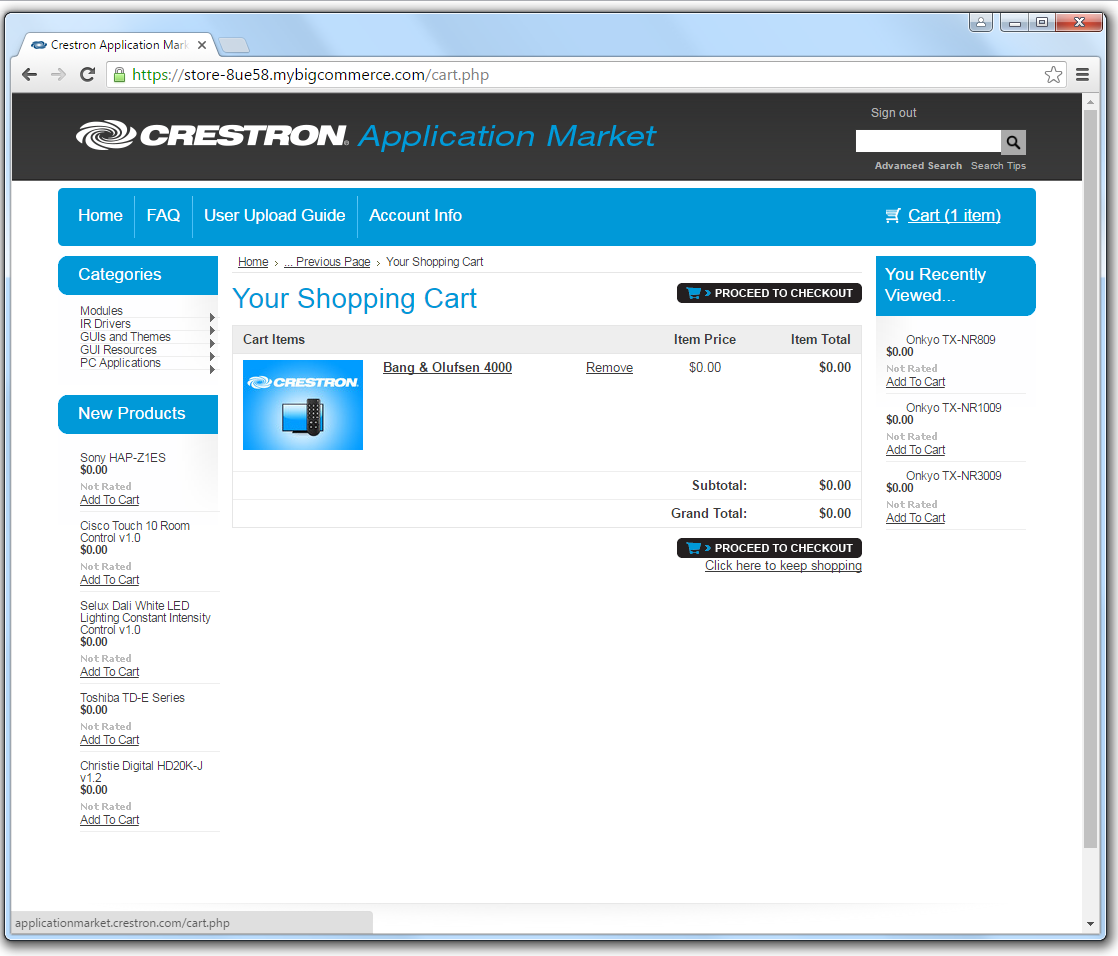
Follow the prompts to select billing address, review your order and to agree to terms and conditions and then click the Continue button.
Click on the link to view your order and download files
- or -
open the confirmation mail in your Inbox and click on the Download
Files link.
The module/IR Driver is downloaded to your PC.
I clicked to download modules for my third party device from the Crestron
Application Market and I got a zipped file containing several different
files of different types. What are they and which ones can I use in Crestron Studio®?
Included in the download file often would be help file (.pdf) for
the module, sample touch screen projects (.vtp), and a working demo program
(.smw) running the module. Additionally the download will also include
one or more of the following:
file with the .umc extension which is a User SIMPL Module created in SIMPL. User SIMPL modules can be imported and opened in Crestron Studio®. Most User SIMPL modules can be modified, if not password protected, in Crestron Studio® as well.
file with the .usp extension which is a User SIMPL+ module containing SIMPL+ source code. User SIMPL+ modules can be imported and opened in Crestron Studio®. Most User SIMPL+ modules can be modified, if not password protected, in Crestron Studio® as well.
file with the .ush extension which is a compiled SIMPL module file. This file CANNOT be opened in Crestron Studio®
file with the .lpz extension which is a compiled SIMPL program. This file CANNOT be opened in Crestron Studio®
file with the .zip extension which might be SIMPL program archive. SIMPL program archive files can be opened and modified in Crestron Studio®
I have custom SIMPL and SIMPL+ modules for a third party device which
is not currently supported in Crestron Studio®.
How would I use them in Crestron Studio®?
Create your own device which will use your custom modules and then simply
add this device to your system. To create your own user device follow
the steps below:
Create
new or open existing user device in Device Designer.
or
by selecting Save Device from
the File menu.
I have an IR Driver (*.ir) file that I downloaded from the Application
Market? How would I use it in Crestron Studio®
to create my own user device? Should I import the IR driver and then just
create user device with IR transport? Is there an easier way to do this?
Yes, you can import the IR driver in Crestron Studio®
and then create an user device that uses IR transport. However, you can
also do the following:
Import the IR driver file to Crestron Studio®
Go to the main toolbar of Crestron Studio® and chose File
Select Import...
When Select Files to
Import dialog opens, scroll to the location of the
IR file (TIP: To be
able to quickly and easily locate your IR Device Definition
files keep them organized in dedicated folder(s)).
If needed, set the File type to: IR
Device Definition (*.ir) and then select the IR driver
you wish to import.
Click Open
File Import Assistant dialog opens, prompting you to specify Import
Location and Import Action.
Note that when importing individual IR files, the only available Import Location is Central - signifying
that the IR driver will be imported to the “Central Crestron Studio® database”, thus making the IR device definition file available for use in any system project.
Select from the following Import Actions:
NEW – Only appears if the IR file has not been imported before. This would be the only option that appears in that case.
USE EXISTING – Crestron Studio® will use the existing IR file and the IR file import process will be aborted. Any program that is being imported at the same time will refer to the existing file.
OVERWRITE – If you choose this option, the IR file data will be overwritten, so that all user devices that refer to this IR file will have their data updated. This may result in Program Designer compiler errors if some IR commands are no longer included in the file.
If you wish to import an IR file that has already been imported to Crestron Studio®, but want to make a completely new user device, so as not to chance overwriting data or using an existing file that you might want to modify, please rename the IR file outside of Crestron Studio®, using a unique name for the new IR file.
After
successful import, the File
Import Assistant dialog displays the status of the
imported IR Definition file
Click Finish.
Go to the Product
Browser and locate the imported IR file.
Imported IR files
are shown as User Devices in
the Product Browser and can
be easily identified by the prefix User
IR: in the Description
column:
Select the desired IR Definition file:
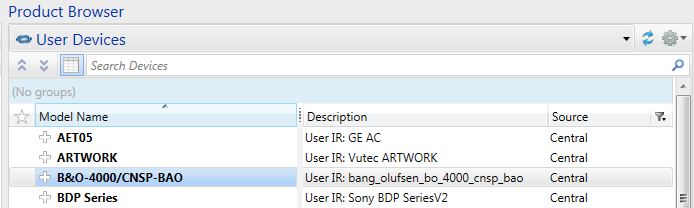
Open the IR device in Device Designer and define the Manufacturer, Device type and Device subtype of the device .
I have a device which was implemented using SIMPL+ and does not use physical connectivity. What do I have to do to be able to bring it to Crestron Studio®?
Devices implemented using SIMPL+ module(s) which do not require physical connectivity are usually pure logic devices, thus in Crestron Studio® you need to create your own user device and use the Logic transport.
To use create such a device in Crestron Studio® just do the following:
Import or create a new SIMPL+ module
Create your custom user device
Click the Change... button and try to define, as accurately as possible, both the Device Type and Device Subtype to match the device you plan to control
Add the Logic transport
Locate the SIMPL+ module created or imported in step 1 in the bottom left pane and then double click on it to add the module to the Programming Pane on top. This will associate the SIMPL+ module with the device
or
by selecting Save Device from
the File menu
What do I need to do if the module for the device I'm trying to control
was implemented using SIMPL#?
Controlling a device implemented in SIMPL# is not much different than
controlling any other third party device.
To use a device implemented in SIMPL# just do the following:
Create new SIMPL+ module
Copy the SIMPL# library file (extension .clz) to the same folder where the SIMPL+ module is located
Reference the SIMPL# Library within the SIMPL+ module by using the SIMPL+ compiler directive #USER_SIMPLSHARP_LIBRARY "library_name" in the 'Include Libraries' section of the SIMPL+ module. Note that the "library_name" should not include the extension.
Call and use class' functions and variables from the SIMPL# library in your SIMPL+ module
Create your SIMPL module, add to it the SIMPL+ module created in step 1
Add the required logic symbols, define the signals and parameters and connect them to their driving sources and destinations as needed
Create your custom user device.
Enter new or modify other General device properties such as Device Manufacturer, Model, Description, etc.
Specify the Device Type and whenever possible the Device Subtype so the device can take advantage of any standard commands and page generation templates available for this device type.
Add the desired transport type (in most cases when working with devices implemented in SIMPL# you will need to use Logic transport).
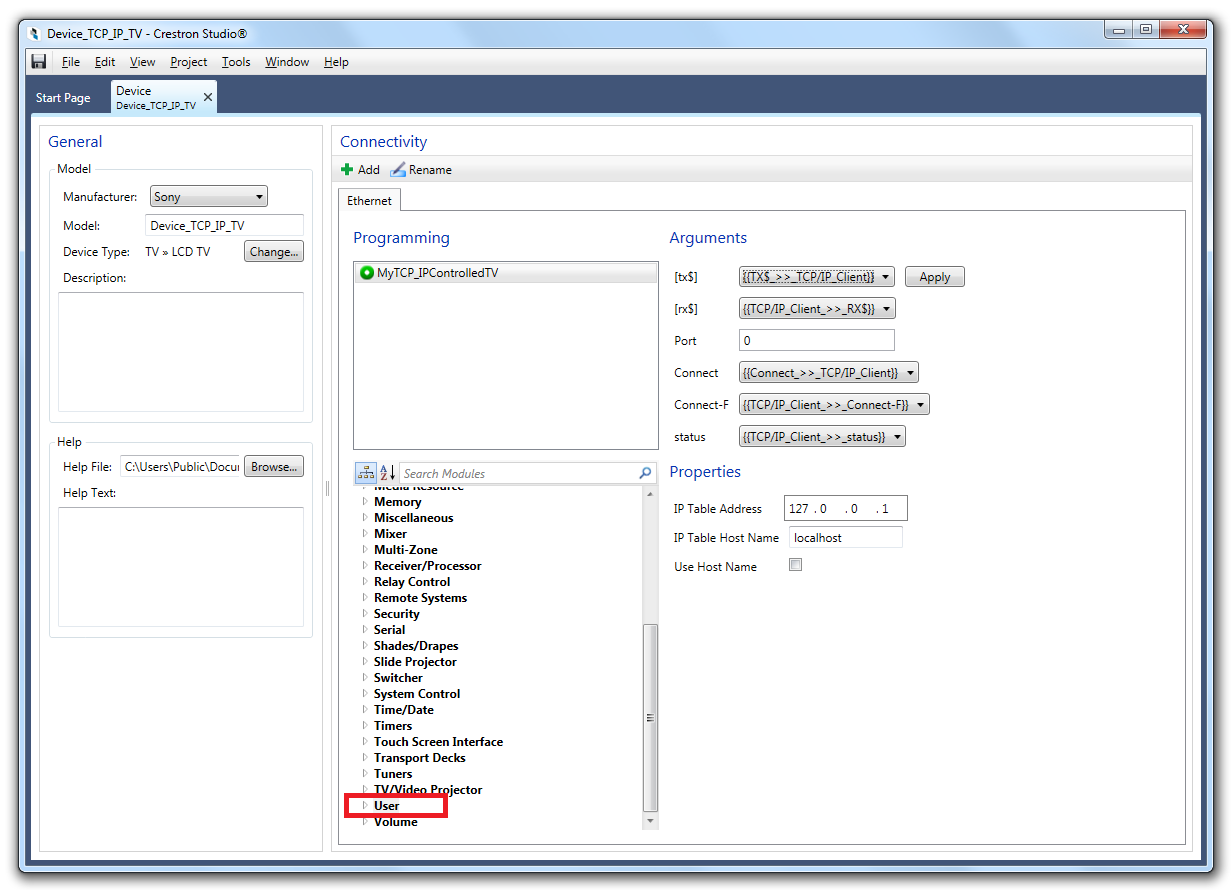
Select the SIMPL module created in step 5 in the Module tree in the Connectivity pane (the SIMPL module will be located in the User branch of the Module tree)
Double click on the module to make it appear in the Programming area on the top.
Save your user device by pressing or by selecting Save Device from the File menu.
Add the device created in step 7 to your system.

 .
.