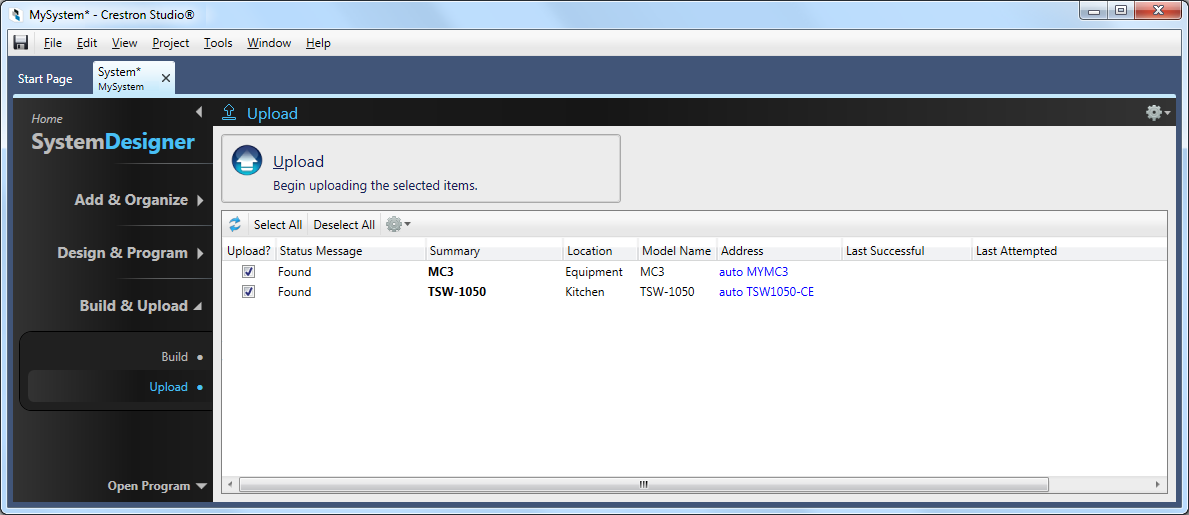
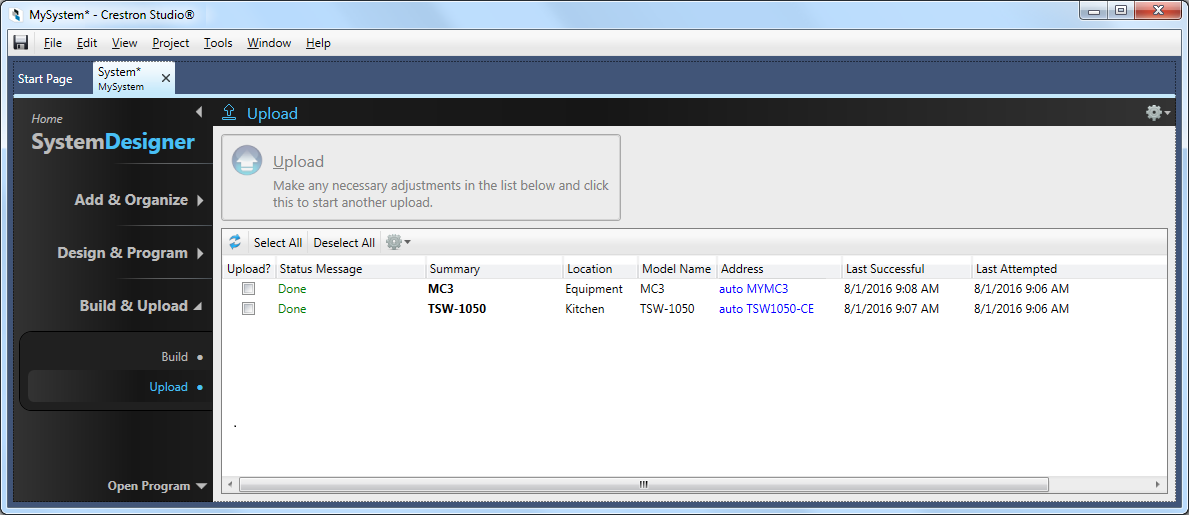
The Upload step is the step where control system programs and touch screen projects are listed, so they can be uploaded to their respective devices.
IMPORTANT: During this step Crestron Studio® will not warn you if there were errors during the Build Step or if the program's build failed. Before uploading, please make sure that the program and/or any design projects have built successfully.
To Upload:
From the System Designer's side bar, click on the Build & Upload section and then select the Upload step.
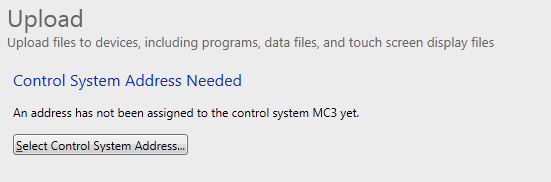
Click on the

button to select control system address from
your Toolbox address book or assign new address. For more information
refer to Toolbox Addresses in
Crestron Studio®.
Crestron Studio® will attempt
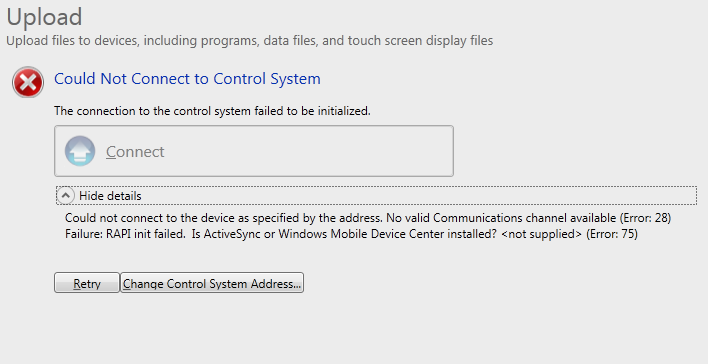
to connect to the control system. If the connection cannot be established
you will be advised to retry connecting to the control system at the
specified address or select new control system address:
After successful communication with the control system the Upload Browser pane lists all projects that can be uploaded for the selected system and information about their current status. Additionally, information about the upload state of the project as a whole is displayed below the Upload button.
|
Status |
Additional Message |
Description |
|
Unexpected Error |
|
Administrator Access Required |
|
|
|
Missing Software |
|
|
|
Minimum Software Required |
|
Control System Required |
A control system is required in order to upload. |
|
|
Control System Address Needed |
An address has not been assigned to the control system yet. |
|
|
Upload |
Please wait while a connection to the control system is established. |
|
|
Could Not Connect to Control System |
|
Error Connecting |
|
Upload |
Please wait while items' connections are being verified. |
|
|
Upload |
Begin uploading the selected items. |
|
|
Upload |
Cancel the remaining uploads. |
|
|
Upload |
Please wait while the remaining items are cancelled. |
|
|
Upload |
Make any necessary adjustments in the list below and click this to start another upload. |
|
|
Refresh Needed |
Some parts of the system have changed. Press the 'Refresh' button to reload the list of items to upload. |
|

Crestron Studio®
also checks if the firmware and the model name of the touch screens match the firmware and model name
of the ones in the compiled project. If they don't, the status for the
touch screen may display status No
Device Found.
The Summary
field expands upon the Status
>information; it lends explanation in more
detail about the possible errors.

For some items more than one status messages may be displayed. For example,
often the status of the control system will be listed as Not
Built, Found or Up
To Date, Found.
If
any of the touch screen designs that you wish to upload were not build,
you have to go back to the Build step and
build them before uploading. When you return to the Upload
step, any newly build or rebuilt designs will display Needs
Verification (Toolbox requires the entire program information
to be reloaded to obtain the device status) status in the Status
Message column:
Click the Refresh
button
in the top left corner of the Upload Browser, press or press the Needs
Verification hyperlink to allow
Crestron Studio®
to reconnect to the devices at the specified addresses and
re-sync their status. Clicking
on the 'Needs Verification' hyperlink will refresh and verify all
devices.
By default Crestron Studio®
is set for indirect
upload of touch screen designs, using the IP address of the control
system, the connection type and the corresponding IP ID of the touch
screen, for example tcp 172.30.168.5:ethernet
03.
If desired you can also upload the design directly to the touch screen
by clicking in the Address
field of the touch screen:
Then select or type in the IP address of the touch screen in the Address Book Dialog
that opens.
Make
sure that the program and all touch screen designs you wish to upload
display status Found or
Up To Date.
NOTE: A program or a touchscreen design with a status of Not
Built, Mismatch or Not Found
cannot be uploaded! The error must be resolved before uploading.
Select the Upload? check box of the
appropriate upload(s) -or- click on the Select
All button, if applicable and click the Upload
button at the top of the Upload screen
or press 


NOTE: Pressing 


will cancel the Upload.
Code is uploaded simultaneously, if possible, to multiple devices. The order of upload is determined by Crestron Studio®, through the use of Crestron Toolbox™. During the upload Status message Upload Browser will
The upload is finished when the
program and all uploaded designs display status message Done.
For efficiency reasons, Crestron Studio® keeps
track of whether it has uploaded code to individual devices. Once
Crestron Studio® uploads code, it will not do so again, unless the code has been changed
and recompiled, or unless it has been specifically requested to do
so (by selecting its check box in the Upload?
column). For example, only modified files (where there has been change
to the time/date stamp) will be uploaded to Smart Graphics™
touch screens.
Consult the table below for more information about the status messages for individual upload items displayed in the Upload Browser:
|
Status Message |
Description |
|
Needs Verification |
A connection to the device needs to be established. |
|
Not Built |
The upload files do not exist because the item has not been built. |
|
No Address |
The device address has not been set. |
|
Finding |
Crestron Studio® is finding the device. Transitions to Found. |
|
Mismatch |
The device at the specified address does not match that of the upload item. |
|
Not Found |
The device could not be found. |
|
Verified |
Crestron Studio® checks communication with the device and checks the firmware name matches the model name of the compiled project. |
|
Queued |
Upload to multiple devices. Pending upload after another device finishes. |
|
Up To Date |
The last time the compiled program was uploaded is after the last the program was built. Crestron Studio® does not check the program uploaded on the physical device to see if it is up to date. |
|
Uploading |
Files are being uploaded to the device. |
|
Done |
All files have been uploaded to the device. |
|
Canceled |
The upload request has been canceled by the user. |
|
Failed |
The upload failed. Failure details are provided in the description area. |
More:
Uploading Multiple Programs to 3-Series Control systems
Toolbox Addresses in Crestron Studio®