
Use this function to manage the Network Address Translation (NAT), and DHCP and Reserved Lease(s) settings of the control system.
Network Address Translation (NAT)
On the NAT Management tab, select the Enable NAT check box to turn-on the NAT feature and view the available settings. You can add, edit and
remove and even clear all port maps during a single configuration session. Click the Apply button after you have completed all the port map configuration changes.
To add a port map
Click Add Port Map... button.
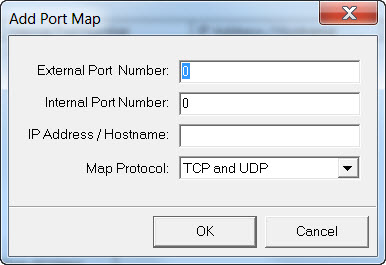
Enter the external port number in the External Port Number field. This is the port number that users outside the LAN must specify to connect to the service on the internal network.
Enter the internal port number in the Internal Port Number field. This is the port number for the specified service on the internal network.
Enter the IP address of the target control system in the Internal IP Address/Hostname field.
Select the network protocol from the Map Protocol list. This specifies the connection type that will be accepted from machines outside the LAN. The choices are UDP, TCP or both (which will accept connections using both protocols).
When port map settings
are completed, click OK. To
send the port map to the control system click Apply.
NOTE: Selecting or de-selecting
the Enable NAT check-box will reboot the control system and add the
port map to the port map list.
To edit a port map
Select the port map from the Current Port Maps list and click the Edit Port Map... button.
Edit the applicable Port Number(s), Internal IP Address/Hostname or Map Protocol fields accordingly.
Click the OK button.
To remove a port map
Select the port map from the Current Port Maps list and click the Remove Port Map button.
Click the Yes button to confirm the deletion and remove the port map.
To clear all port maps
Click the Clear All Maps button to remove all current port maps.
Click the Yes button to confirm the deletion and remove the port map.
NOTE: Remember to click the Apply button after you have completed all the port map configuration changes.
DHCP Leases

On the DHCP Leases tab, click the Refresh button to refresh the DHCP leases for active DHCP-based devices on the Control Subnet.
To make a DHCP lease a Reserved Lease
Select the desired lease from the Active DHCP Devices on Control Subnet list window.
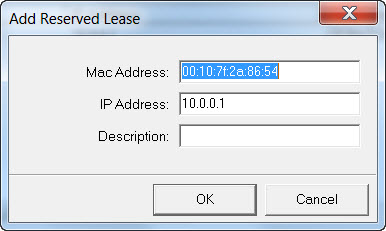
Click the Make Reserved... button to make [add] this lease as a Reserved Lease.
In the Add Reserved Lease dialog box's Description text box, enter a description, and click the OK button.
Reserved Leases

On the Reserved Leases tab, you can add, edit and remove and clear all reserved leases during a single configuration session. Click the Apply button after you have completed all the reserved lease configuration changes.
To add a lease
Click Add Lease... button.
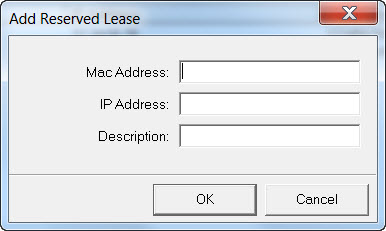
Enter the Mac Address in the Mac Address field.
Enter the IP address in the Internal IP Address field.
Enter a description in the Description field.
When the reserved lease
settings are completed, click OK.
To edit a lease
Select the lease from the Reserved Leases list and click the Edit Lease... button.
Edit the applicable Mac Address, IP Address, and Description fields accordingly.
Click the OK button.
To remove a lease
Select the lease from the Reserved Leases list and click the Remove Lease button.
To clear all lease
Click the Clear All Leases button to remove all reserved leases.
NOTE: Remember to click the Apply button after you have completed all the reserved lease(s) configuration changes.
Dynamic Ports

On the Dynamic Ports tab, you
can configure 100 ports in a port range to be used for connecting devices
on the control subnet.
To specify a port range
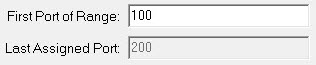
In the First Port of Range text box, enter a number between 1 and 65435. Press the Tab key to depart the text box. Note: the Last Assigned Port text box is display-only.
Click the Apply to apply the port range. NOTE: this will re-boot the device.

To Save The Router Configuration
Click the Save... button.
In the Save
Router Configuration dialog box, enter the full file path and a file name for the
configuration file in the Select
File text box; enter a description in the User
Description text box.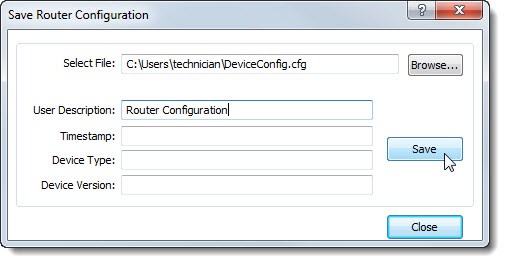
Alternatively, Browse button to open the Save As dialog box; this selects the default file path (default = Device Configuration folder); enter a file name in the File name text field: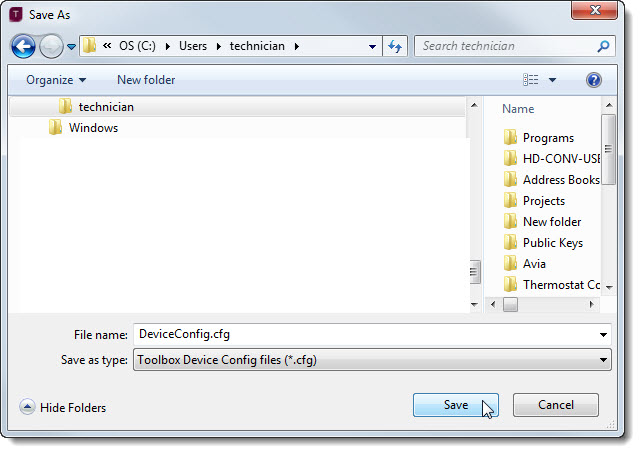
Press the Save button to populate the Save
Router Configuration dialog box's Select File text box with the corresponding full file path and file name.
Click the Save button to save the router configuration; the settings from all configuration tabs are saved.
To Load A Router Configuration
Click the Load... button.
In the Load Router Configuration dialog box, enter the file name and path of the configuration file in the Select File text box -or- click the Browse... button to drill to the configuration file's file location.
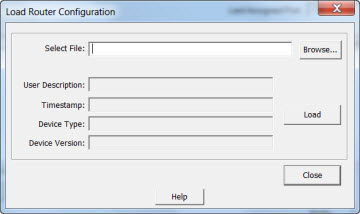
Click the Load button. Note: This may cause the device to re-boot depending upon the device.
NOTE: The Apply All button will apply the new and modified router configuration settings made on all four configuration tabs. The Close button discards any (all) made on any (all) configuration pages.