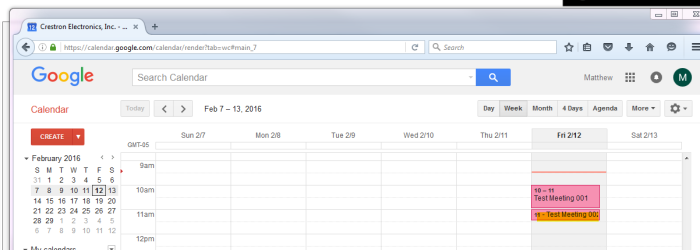
Set Up Crestron Fusion to Access Google Calendar API
This section describes how to configure Crestron Fusion to access the Google Calendar API. The system-wide security settings will be configured using data from Configure the Google Calendar API. This section also includes instructions on how to link a room represented by Crestron Fusion to a Google Calendar.
Upload a Private Key
- Navigate to the Crestron Fusion Configuration Web Client.
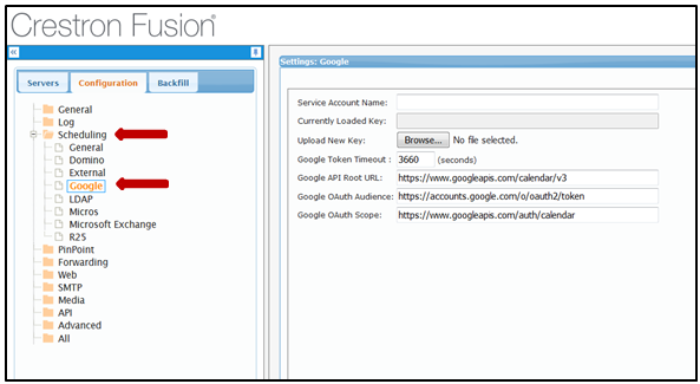
- Select Scheduling and then select Google to open the Settings: Google form.
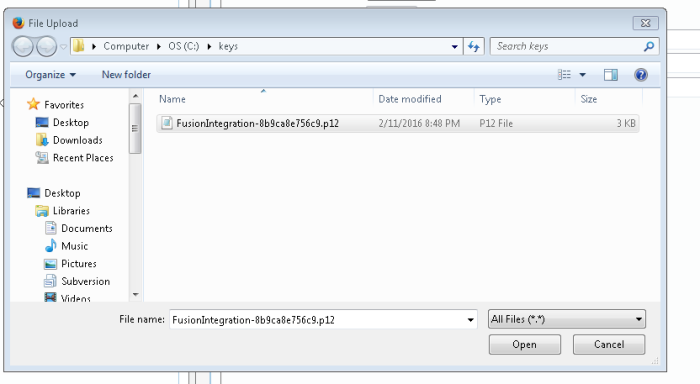
- Select Browse to open the File Upload dialog box.
- Navigate to the location where the key file was stored. Locate and select the private key file, and then select Open.
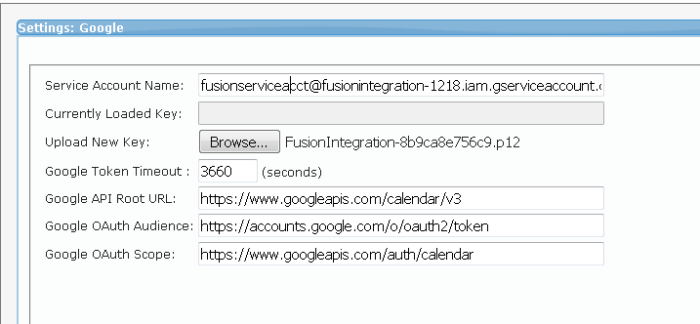
- Enter the Service Account email address in the Service Account Name field that was entered in Configure the Google Calendar API.
- Select Save.
Crestron Fusion Configuration Web Client – Settings: Google Form
File Upload Dialog Box with Key File
Settings: Google Form
Configure Rooms in Crestron Fusion to Use Google Calendar API
To set up each room represented by a Google calendar:
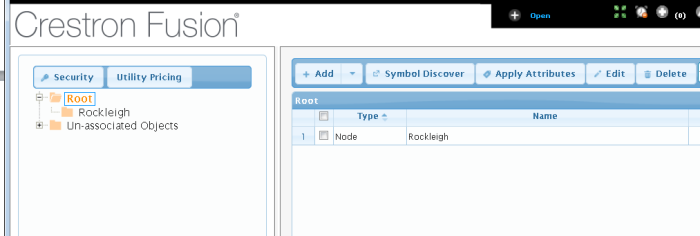
- Navigate to the Crestron Fusion Setup Web Client, select the node, and then add the room.
- Select the Add drop-down list (if the room has not been created), and then select Add Room.
- Select the Room node if the room has already been created.
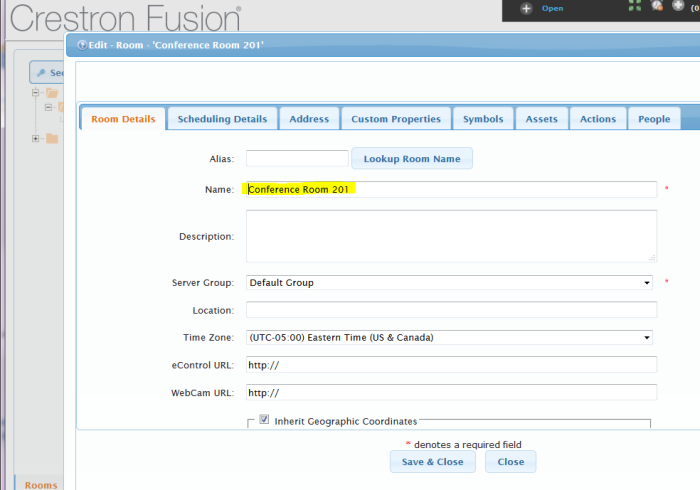
- Complete the first page of the Room Details tab if adding a new room.
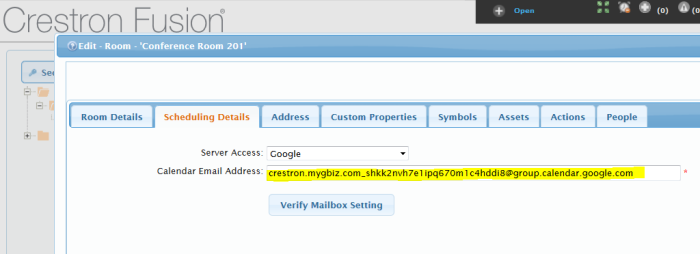
- Select the Scheduling Details tab, and then select Google from the Server Access drop-down list.
- Enter the email address of the first room entered.
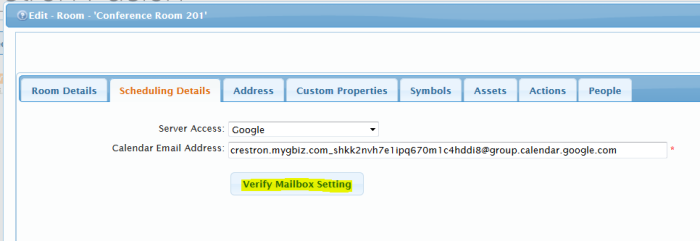
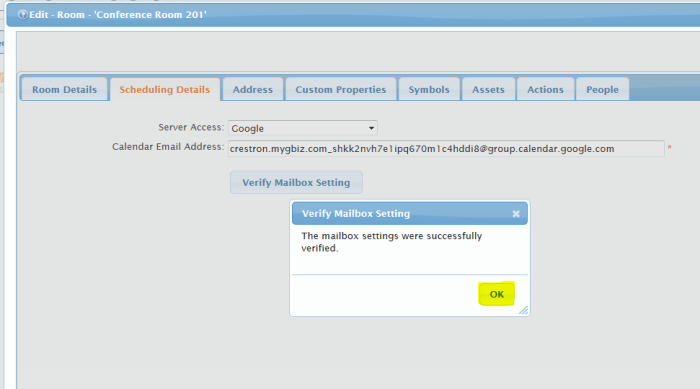
- Select Verify Mailbox Setting to ensure the room is configured for proper integration with Crestron Fusion.
- Select OK.
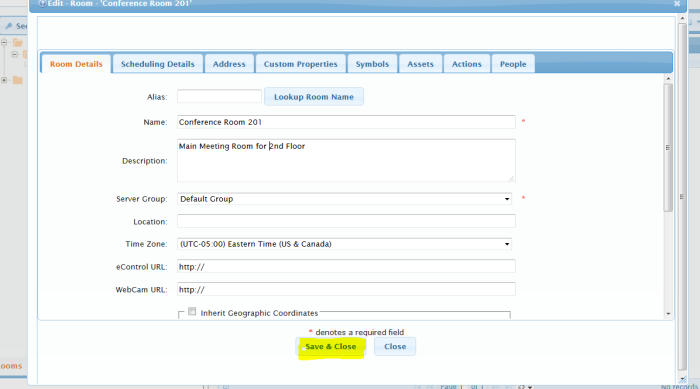
- Select the Room Details tab. If creating a new room, fill in the required fields (shown with red asterisks).
- Repeat the above steps for the remaining room email addresses.
- Select Save & Close after adding email addresses for the rooms.
Crestron Fusion Setup Web Client
Room Details Tab
Scheduling Details Tab
Verify Mailbox Setting
If the room is configured properly, the Verify Mailbox Setting message box displays.
Verify Mailbox Setting Message Box
Room Details Tab
Perform a test of the synchronization between the Google and Crestron Fusion calendars as follows:
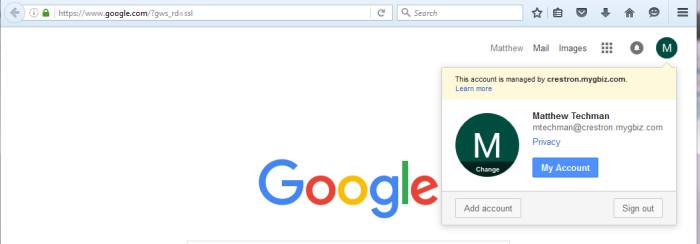
- Navigate to Google.com and sign in as an Administrator. Refer to Initial Setup for more information.
- Select the grid icon to open the Google Application menu.
- Select the Calendar icon to open the Google Calendar page.
- Select one room created in the previous section. This will display the Room’s calendar in the UI.
- Select any time slot (after the current time) to open the Add Meeting form.
- Enter a title for the meeting and then select Save.
- Open the Crestron Fusion Web Client and select the RoomView® Monitoring link.
- From the Schedule tab, select the room and the date the meeting is scheduled. The meeting created in step 6 above should appear on the Crestron Fusion calendar.
- Select the meeting.
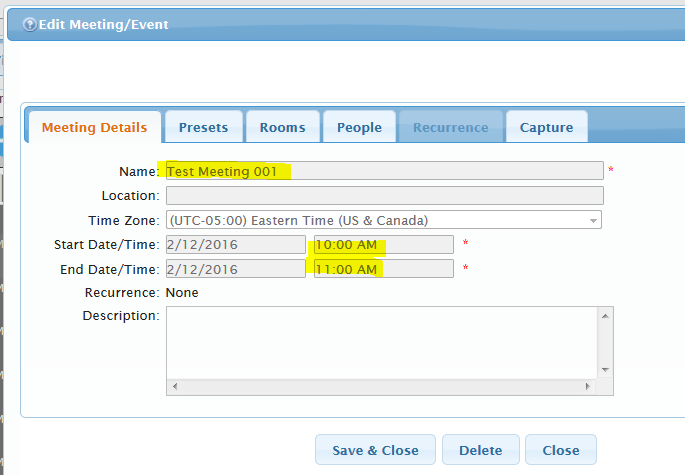
- From the Meeting Details tab, verify the meeting times (Name, Start Date/Time, and End Date/Time).
- After the meeting is set by the Google Calendar, create a meeting in Crestron Fusion.
- Navigate back to the Google Calendar. The meeting created in Crestron Fusion should appear on the Google Calendar below the meeting created in step 6.
Administrator Sign In
Grid Icon
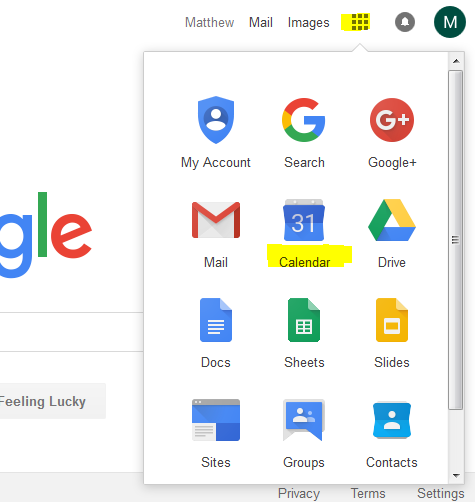
Google Calendar Page
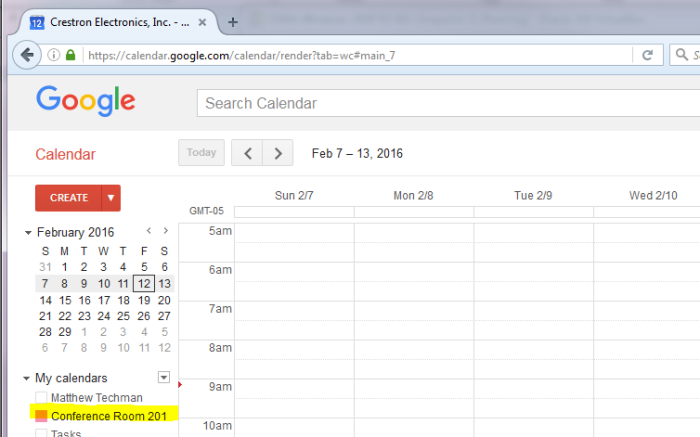
Add Meeting Form
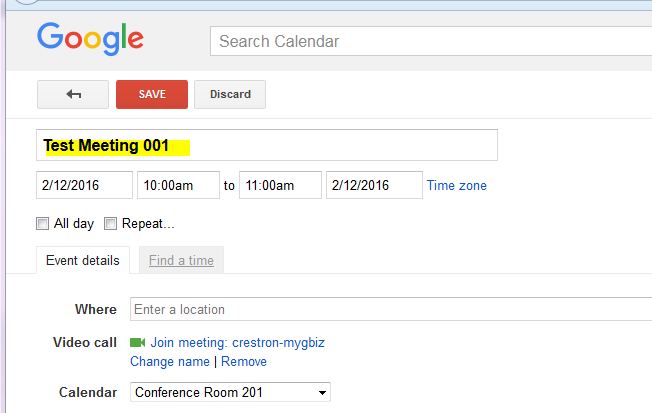
Booked Meeting on Google Client Calendar
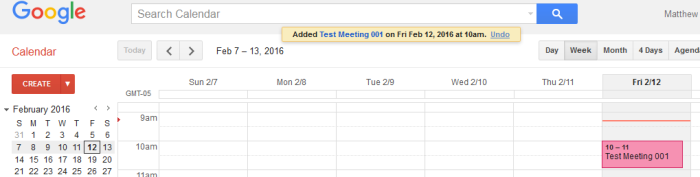
A message indicating the meeting was created should appear along with the meeting displayed on the room’s calendar.
Crestron Fusion Web Client Menu - RoomView® Monitoring

Crestron Fusion Calendar Showing Meeting
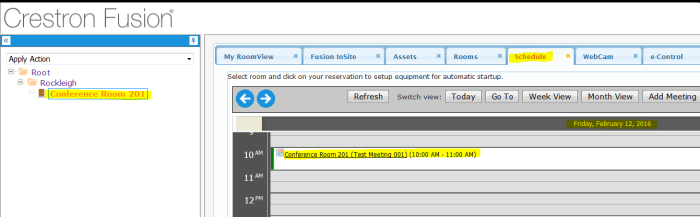
Meeting Details Tab
Create New Meeting
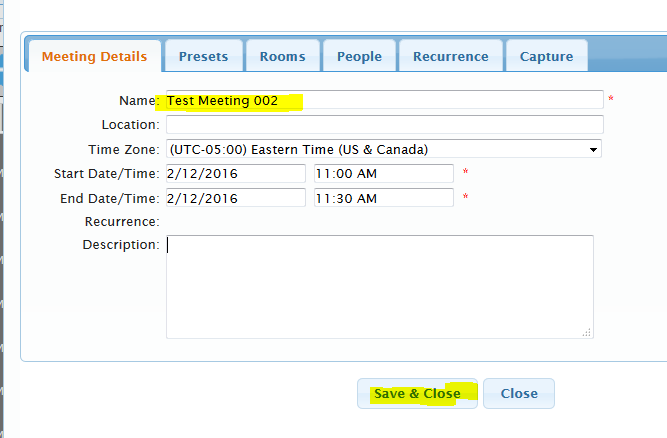
Google Calendar Showing Meeting Created in Crestron Fusion