The Property Grid
The
Property Grid tool window
allows you to set or edit attributes for the following items:
To
access the Property GridTool Window, do the following:
-
Point
to the Viewmenu in the main toolbar of Crestron Studio®
-
ChooseTool
Windowsand then selectProperty Grid
-
Click
in the checkbox next to the name of the Property
Grid
-
A
check mark  appears
indicating that the Property
Grid tool window is visible. (To hide the Property
GridTool Window, click the check
box to make the check mark disappear.)
appears
indicating that the Property
Grid tool window is visible. (To hide the Property
GridTool Window, click the check
box to make the check mark disappear.)
As
all other tool windows in Crestron Studio®
the Property Grid can be resized
and/or moved to another location in the application window, i.e. the Property Grid is dockable. The Property Grid and the other Touch Screen Designer
tool windows (Control Library,
Resource Library, Design
Explorer, Programming Editor)
can be stacked on top of each other when docked. When changed, the size
and location of the Property Grid
are saved automatically.
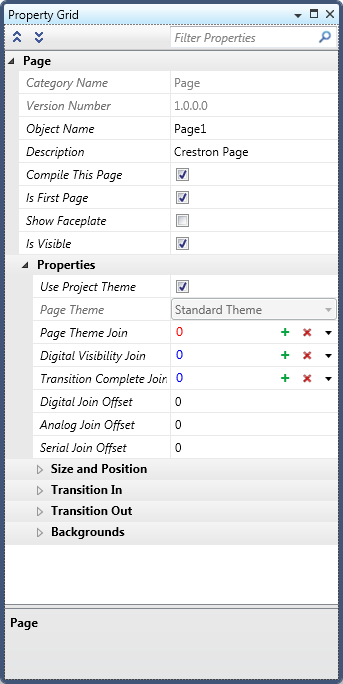
Information
in the Property Grid
is divided into two columns: Property
Name(column to the left) and Property Value(column
to the right). If desired, you can manually adjust the width of
the columns. To do so, place your cursor over the divider between the
Property Name and
Property Value columns.
The cursor changes to a double-arrow  . To widen the
column, move your mouse cursor to the right. To make the column narrower,
move it to the left.
. To widen the
column, move your mouse cursor to the right. To make the column narrower,
move it to the left.
To
display the Property Grid
for a particular item, the item must be selected. For example, Property Grid displays information
at the project level when the name of the project is selected in Design Explorer.
Press the Expand
All  button at the top of the Property
Grid
button at the top of the Property
Grid
-or-
Right-click any text row
in the grid. In the menu that opens, click Expand
All.
-or-
Alternatively
you can use the 

 key
combination.
key
combination.
-
Press the Collapse
All  button at the top of the Property
Grid
button at the top of the Property
Grid
-or-
Right-click anywhere in
the grid. In the menu that opens, click Collapse
All.
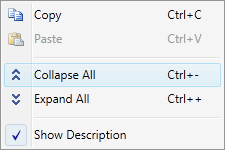
-or-
Alternatively you can use the  key
combination.
key
combination.
-
The Property
Value column allows you to modify the value of the selected
property. Depending on the property, you can enter text, a numeric
value, select an item from a drop-down list, select an item from a
dialog, and so on. When the value of a
property has changed, the Property name font changes to italic to
indicate that this property value has not been saved yet.
For detailed information, refer to Setting
Attributes in the Property Grid.
-
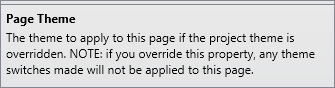
A description box at the bottom of the Property Grid list description of
the selected property. For example:
-
NOTE:
If multiple items are selected, the Property
Grid displays the number of items selected and indicates the
last selected item. Displayed are only the properties that are common
to all selected items.
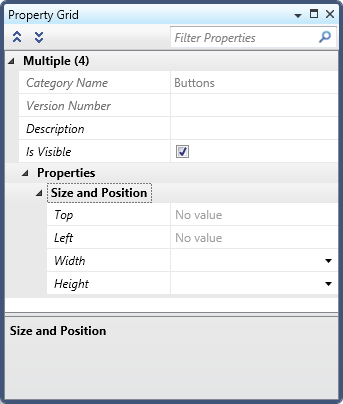
For additional information, refer to Setting
the Properties of Multiple Items Using the Property Grid.
More:
Property Grid Keyboard Shortcuts
Setting
Attributes in the Property Grid
Setting
the Properties of Multiple Items Using the Property Grid
 to the left of
the property group name.
to the left of
the property group name. again.