
Use this function to enable device authentication, create user accounts and passwords, and set password policies and authentication settings.
To turn on authentication
Select the Authentication
Enable check box to launch the Create
Admin Info... group box and create the administrative account,
which is required to turn on Authentication.
NOTE: The Create
Admin Info...group box is displayed only if no administrative
account is present on the device.
Create Admin Info...
Type the admin[strator] information in the Username, Password, and Verify Password text boxes, and click the OK button. This reboots the device. After the device initialization, you will be prompted for the Username and Password to connect to the device.
Authentication
After the reboot, Toolbox displays an Authentication dialog box with a single tab: Current User.
To change the current user's password, click on the Change Current Users Password button.
Type the new password in the Password and Verify Password text boxes, and click the OK button.
The Authentication dialog box adds the following tabs: Current User, Users, Groups, Blocked IPs, and Authentication Options.
NOTE: The User, Groups and Blocked IPs tabs appear only if you are logged in with an account in the Administrators group. Similarly, you must be logged into the device as the administrator or with an account in the Administrators group to perform any tasks on the User, Groups or Blocked IPs tabs.
User Tab
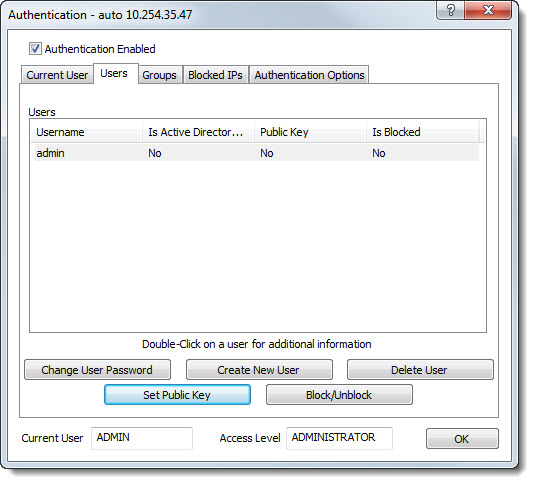
To change user password
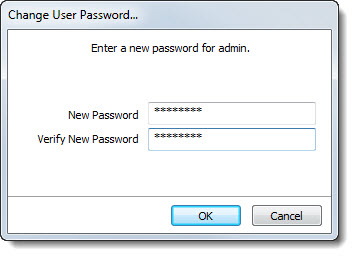
To create and delete users
Click on the Create New User button.
In the Create
New User... dialog box, type the user information in the Username for new user, Password for new user and Verify Password
text boxes:
In the Groups To Join group box, click on a Group to assign the new user to it. The user inherits the group's access level/rights. Use CTRL+Click to assign the new user to multiple groups.
Click the OK button when finished.
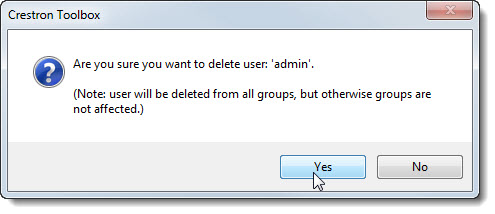
To delete a user, click on the user name to
highlight it and then click the Delete
User button. Click the Yes
button to confirm the deletion:
To add users to a group or to remove users from a group
Double click on the user name. The User
Information dialog box displays the user's group memberships: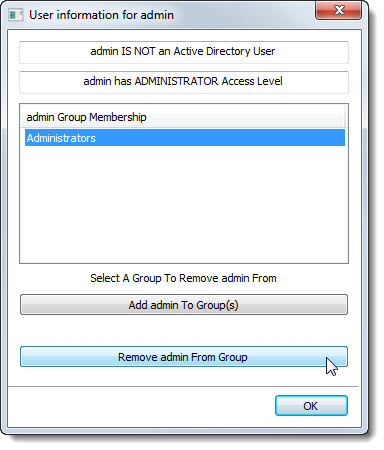
Click the Add User Name to Group(s) button (where User Name is the actual user name).
The Select Groups for User Name dialog box displays. Click
on the appropriate group. Use CTRL+Click to add the new
user to multiple groups. Click the OK
button to return to the main Authentication
dialog box:
Click the appropriate group and then click the
Remove User
Name from Group button.
Click
the OK button
and then click the Yes button
to confirm the user's removal from the group. Click the OK button
to return to the main Authentication dialog
box.
Click on the Set Public Key
button: 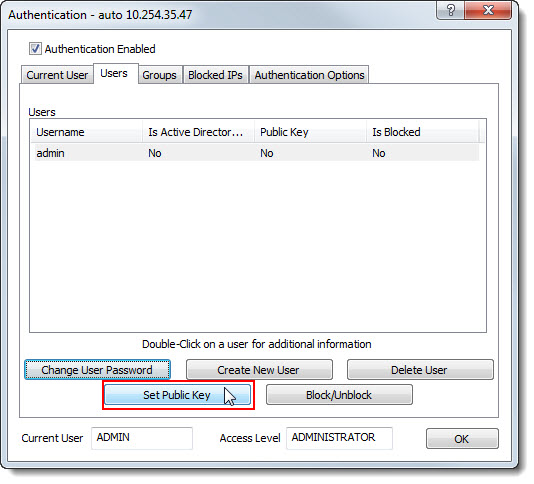
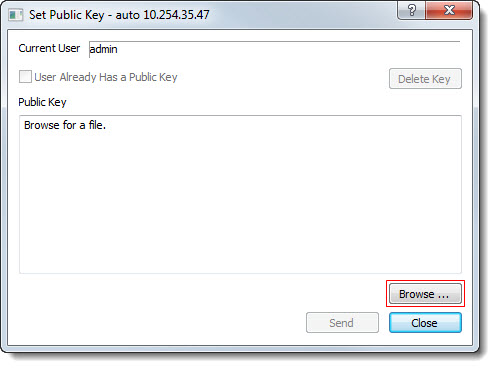
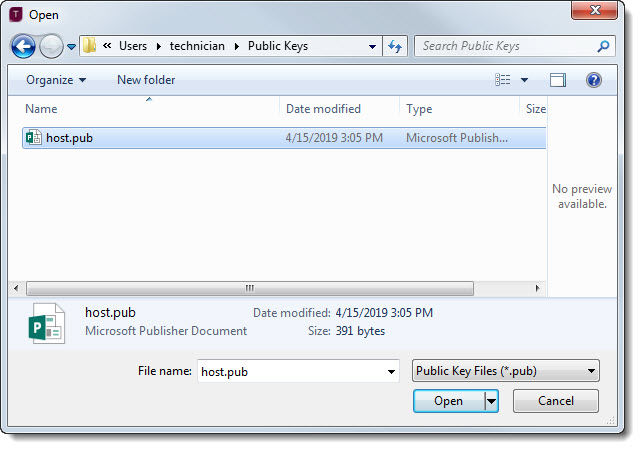
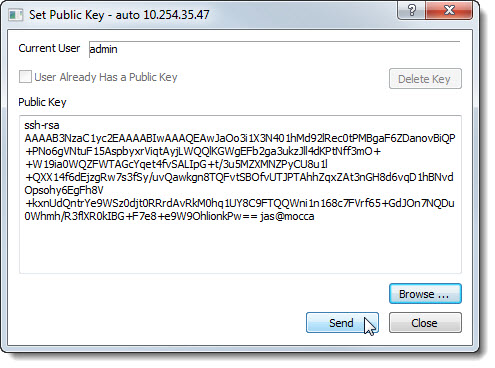
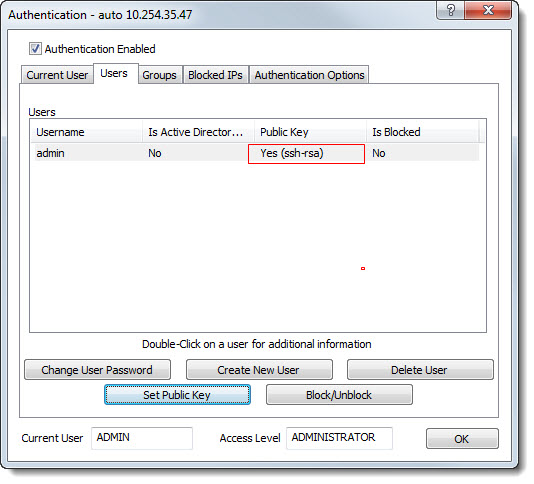
To block/unblock a user
Select the applicable user and click on the Block/Unblock
button:
In the Block/Unblock dialog box, select the BLOCK user or UNBLOCK ALL users radio button, as applicable, and click the OK button: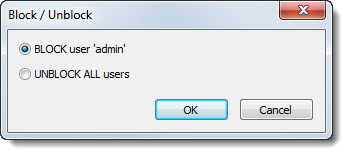
Groups Tab
To create a group or delete a group
Click on the Groups tab.
To create a group, click on the Create Group button. Type the group name in the Create Group on Device... dialog box's Group Name text box. In the Group Access Level drop-down combo box, use the drop-down arrow to select the appropriate group access level for the new group. Click the OK button. Click the OK button again in Done message box.
To delete a group, select the group form Current Groups list box and click on the Delete Group button. Click the OK button to confirm the deletion.
To display group information
Click on the Groups tab.
Double click on the appropriate group in the Current Groups list box to display Group information box for the selected group.
If the group is empty, the Add User(s) To GROUP name and Add AD User(s) To GROUP name buttons are available (where GROUP name is the actual group's name).
If the group has users, the Remove User From GROUP name button is available.
To add an Active Directory Group to a device
Click on the Groups tab.
Double click on the appropriate group in the
Current Groups list box to
display Group information
box for the selected group:
In the Active Directory Group Authentication... dialog box, enter the Active Directory server name in the Domain text filed , enter a valid user name and password in the corresponding Username and Password text fields and click the OK button: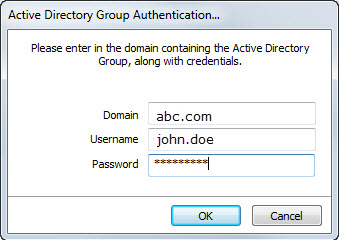
Note: Some control systems may require Active Directory Group Authentication--and other control systems may not.
In the Add Active Directory Group to Device... dialog box, type the Active Directory Group in the Group Name text box:
Notes:
For example, “swdevtoolsadmins” will work on 3-series but needs to be “SWDevToolsAdmins” on 4-series.
For example, “rnd.com\ SWDevToolsAdmins” on 3-series, just “SWDevToolsAdmins” on 4-series.
Click on the Group Access Level drop-down, select the applicable access level and then click the OK button: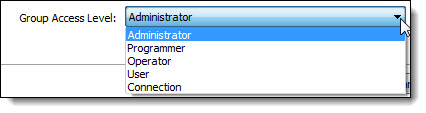
In the Active Directory Group successfully added dialog box, click the OK button: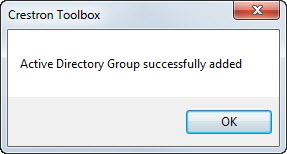
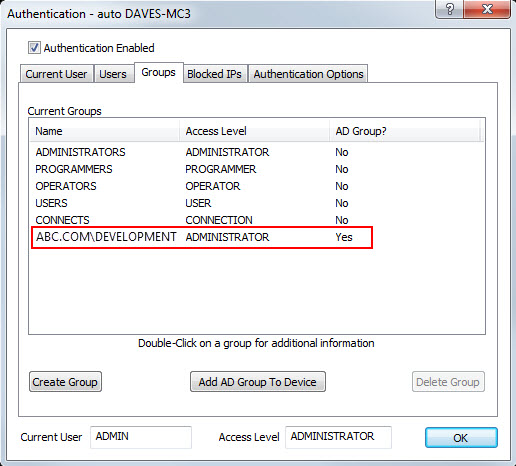
The Active Directory Group is displayed in the Groups - Current Groups table; a Yes in the AD Group? column indicates that this group is an Active Directory Group.
On the Groups Tab, double-click on ADMINISTRATORS (or other applicable Group):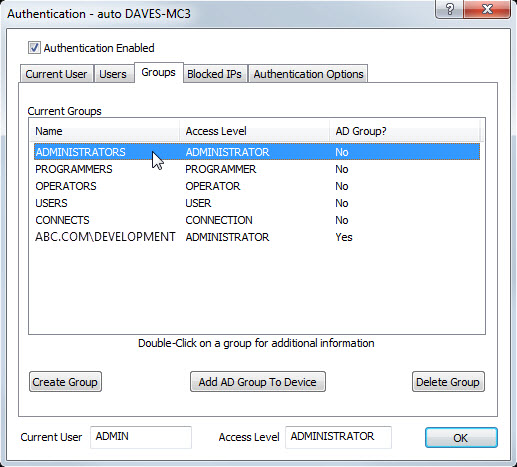
In the Group information for ADMINISTRATORS dialog box, click the Add AD User(s) to ADMINISTRATORS: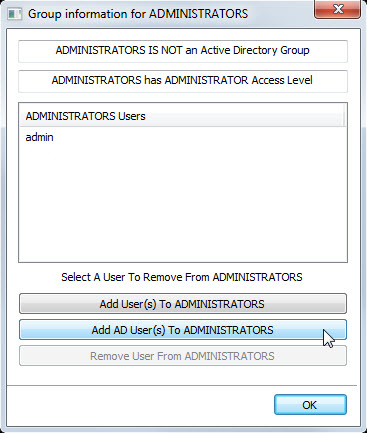
In the Select AD User(s) for ADMINISTRATORS dialog enter the AD User in the form Domain\Username and click the OK button: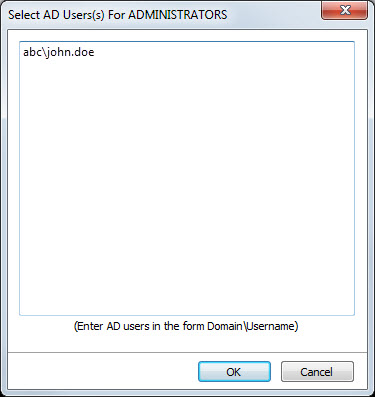
Note:
For example, “rnd\john.smith” on 3-series must be “rnd.com\john.smith” on 4-series.
In the AD Group Authentication... dialog box, add the applicable credentials to add the above AD User and click the OK button: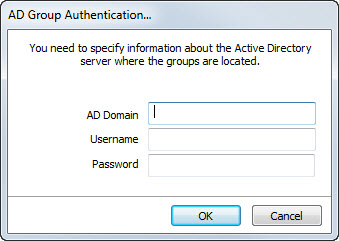
Note: Some control systems may require Active Directory Group Authentication--and other control systems may not.
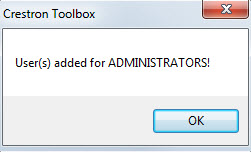
In the User(s) added for ADMINISTRATORS! dialog box, click the OK button.
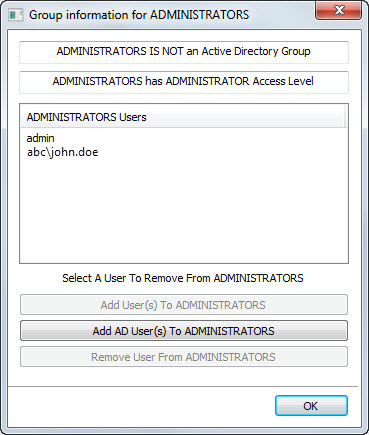
On the Groups Tab, double-click on ADMINISTRATORS (or other applicable Group) to confirm display the added user:
Block IPs Tab
To block an IP Address or to remove a blocked IP Address
To block an IP address, click the Add Address To Blocked List button.
Enter the IP address in the Add Blocked IP Address dialog box's Specify an IP Address To text box.
Click the OK button on the Done message box to return to the Block IPs tab.
To remove a blocked IP address, click on the IP address in the Blocked IP Addresses list box and then click on the Remove Address From Block button.
Click the OK button on the Done message box to return to the Block IPs tab.
To block an IP Address for a limited amount of time
Un-check the No Limit check box.
Enter the time in hours in the Time
an IP Address remains on the blocked drop-down
combo box or use the drop-down arrows.
Note: A blocked IP address is indefinitely blocked unless a time
limit is entered.
Authentication Options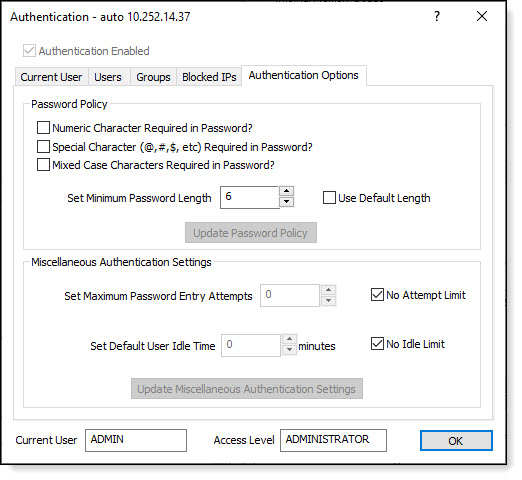
To set authentication options
To set password policy
Select the appropriate check boxes from the Authentication Options tab's Password Policy group box to require numeric, special or mixed case characters (mixed case characters = a mix of upper and lower case characters) in the password.
To set a minimum password length, un-check the Use Default Length check box; type the minimum password length in the Set Minimum Password spin box or use the up-arrow or down-arrow.
Click the Update Password Policy button, to set the specified password policy.
Note: These password policies are applied when new users and passwords are created; these policies are not retroactively applied to previously created passwords.
To configure miscellaneous authentication settings
To set a password entry attempt limit, un-check the No Attempt Limit check box in the Miscellaneous Authentication Settings group box, type the allowable number of password entry attempts in the Set Maximum Password Entry combo box.
To set an idle time that logs out the user due to inactivity, un-check the No Idle Limit check box; type the idle time in minutes in the Set Default User Idle combo box or use the up- or down-arrow.
Click the Update Miscellaneous Authentication Settings button to apply the settings.