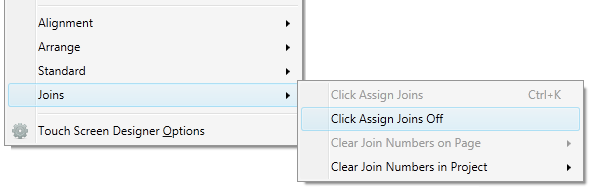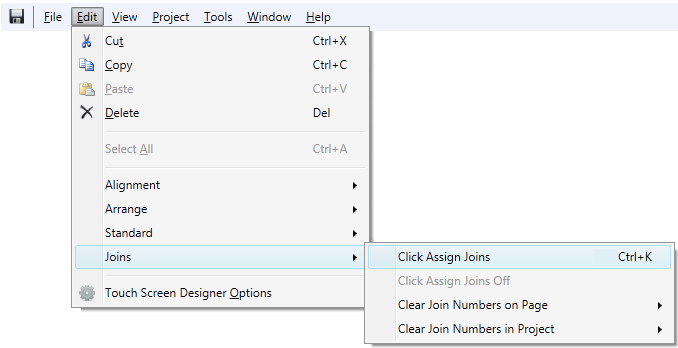
The Click Assign functionality in Crestron Studio® provides an efficient method to automatically assign joins to multiple controls at a time, by clicking on the desired Smart Graphics®controls (including pages and subpages). The Click Assign function enables you to assign join numbers to any number of Smart Graphics®controls you click.
To activate Click Assign Mode:
-or-
click the Click
Assign icon  from the (Standard)
toolbar of Touch Screen Designer.
from the (Standard)
toolbar of Touch Screen Designer.
-or-
press 

 .
.
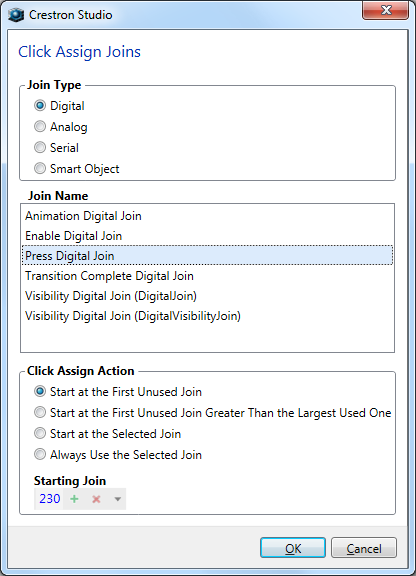
Join Type - Choose
if you wish to assign join numbers to Digital,
Analog,
or Serial
joins, or to assign Smart
Object IDs (to Smart objects).
The type of join you select initially will be remembered
and used
as the default join type in any further Click Assign operations
which you perform in the same Crestron Studio®
session.
Join Name (not available
for Smart Objects) - Choose the specific join name from
the list of all join names used in your project , for example:
For digital joins,the
Click Assign Action:
Start
at the First Unused Join - Join assignment will begin
with the first unused join number of this type and will continue
with the next available join number(s). Note that when using
this click assign method, the join numbers assigned are often
non-sequential. The number of the first join that will be
assigned is displayed (but the join number cannot be modified)
in the Starting Join
field at the bottom of the Click Assign action pane:
For example:If you wish to assign Digital Press Joins to three
buttons where the first two buttons have already the join
numbers six and seven assigned and the third button has no
join number assigned, i.e. it's Digital Press Joins equals
zero. In click assign mode (when you choose the Replace),
when clicking on:
Button 1: its join goes from 6 to 8; Join 6 becomes unused
Button 2: its join goes from 7 to 6; Join 7 becomes unused
Button 3: its join goes from 0 to 7.
Start
at the First Unused Join Greater than Largest Used
- Join assignment starts with the first unused join after
the largest join used in the project. The number
of the first join that will be assigned is displayed (but
the join number cannot be modified) in the Starting
Join field at the bottom of the Click Assign action
pane.
Start
at the Selected Join - Join assignment starts at the
join number selected in the Starting
Join field (at the bottom of the Click Assign action
pane). 
To select a different join number than the one displayed:
press the increment join icon  to increment the displayed
default join number by 1, till you reach the desired number
to increment the displayed
default join number by 1, till you reach the desired number
-or-
press
the clear join icon  to set the starting join number to 0
-or-
click
the expand button  to open
the join
dialog and then select the desired join number.
to open
the join
dialog and then select the desired join number.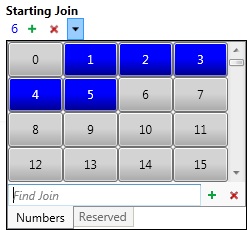
Always Use Selected Join - Join number selected in the Starting Join field is assigned to every clicked Smart Graphics® control. Note that this option is disabled when the selected Join Type is Smart Object, since each Smart Object must have a unique Smart Object ID!
Assigning Joins in Click Assign Mode
Once in Click Assign Mode the mouse cursor changes to a hand pointer icon. Simply position the hand over each Smart Graphics® control (either in the Workspace, Design Explorer) and click to apply the settings selected in the Click Assign Joins dialog.
After a successful Click Assign operation, the following message is
displayed: 



In case the 'clicked' Smart Graphics®
control already has a join assigned, you will be presented with a dialog requesting
how to proceed: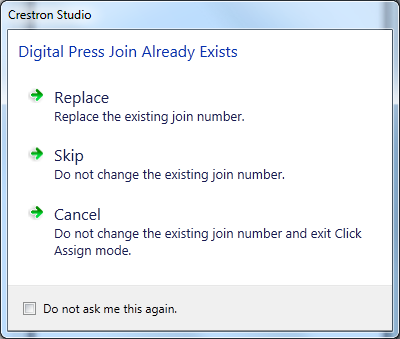
If you choose not to make a selection or press  to dismiss the dialog, the default action is 'Replace'.
Note that if you check “Do not ask me this again” check box, the selected course of action will apply to the entire Crestron Studio® session and not just the current Click-Assign operation.
Clicking on an object that does not support the selected join type,
will trigger the following message  .
.
To Exit Click Assign Mode:
Press the  key.
key.
Alternatively, point to the Editmenu, select the Joins
sub-menu and then choose Click Assign
Joins Off